Contributed by Mengying Li on 2025-12-08
Lovable is a no-code platform that helps non-technical builders create real applications with AI features. After building your app with Lovable, the next step is connecting it to Braintrust so you can see what the AI is doing and iterate confidently. This cookbook guides you through adding Braintrust observability and evaluations to your Lovable app, which runs on Supabase Edge Functions with Deno. By the end of this cookbook, you’ll learn how to:
  • Add Braintrust logging to a Lovable app running on Supabase Edge + Deno
  • Configure the Braintrust SDK to send traces for observability
  • Run evals to inspect AI behavior including prompts, tool calls, and responses
  • Set up remote evals to test changes in your Lovable AI features before deploying

Getting started

To get started, make sure you have:

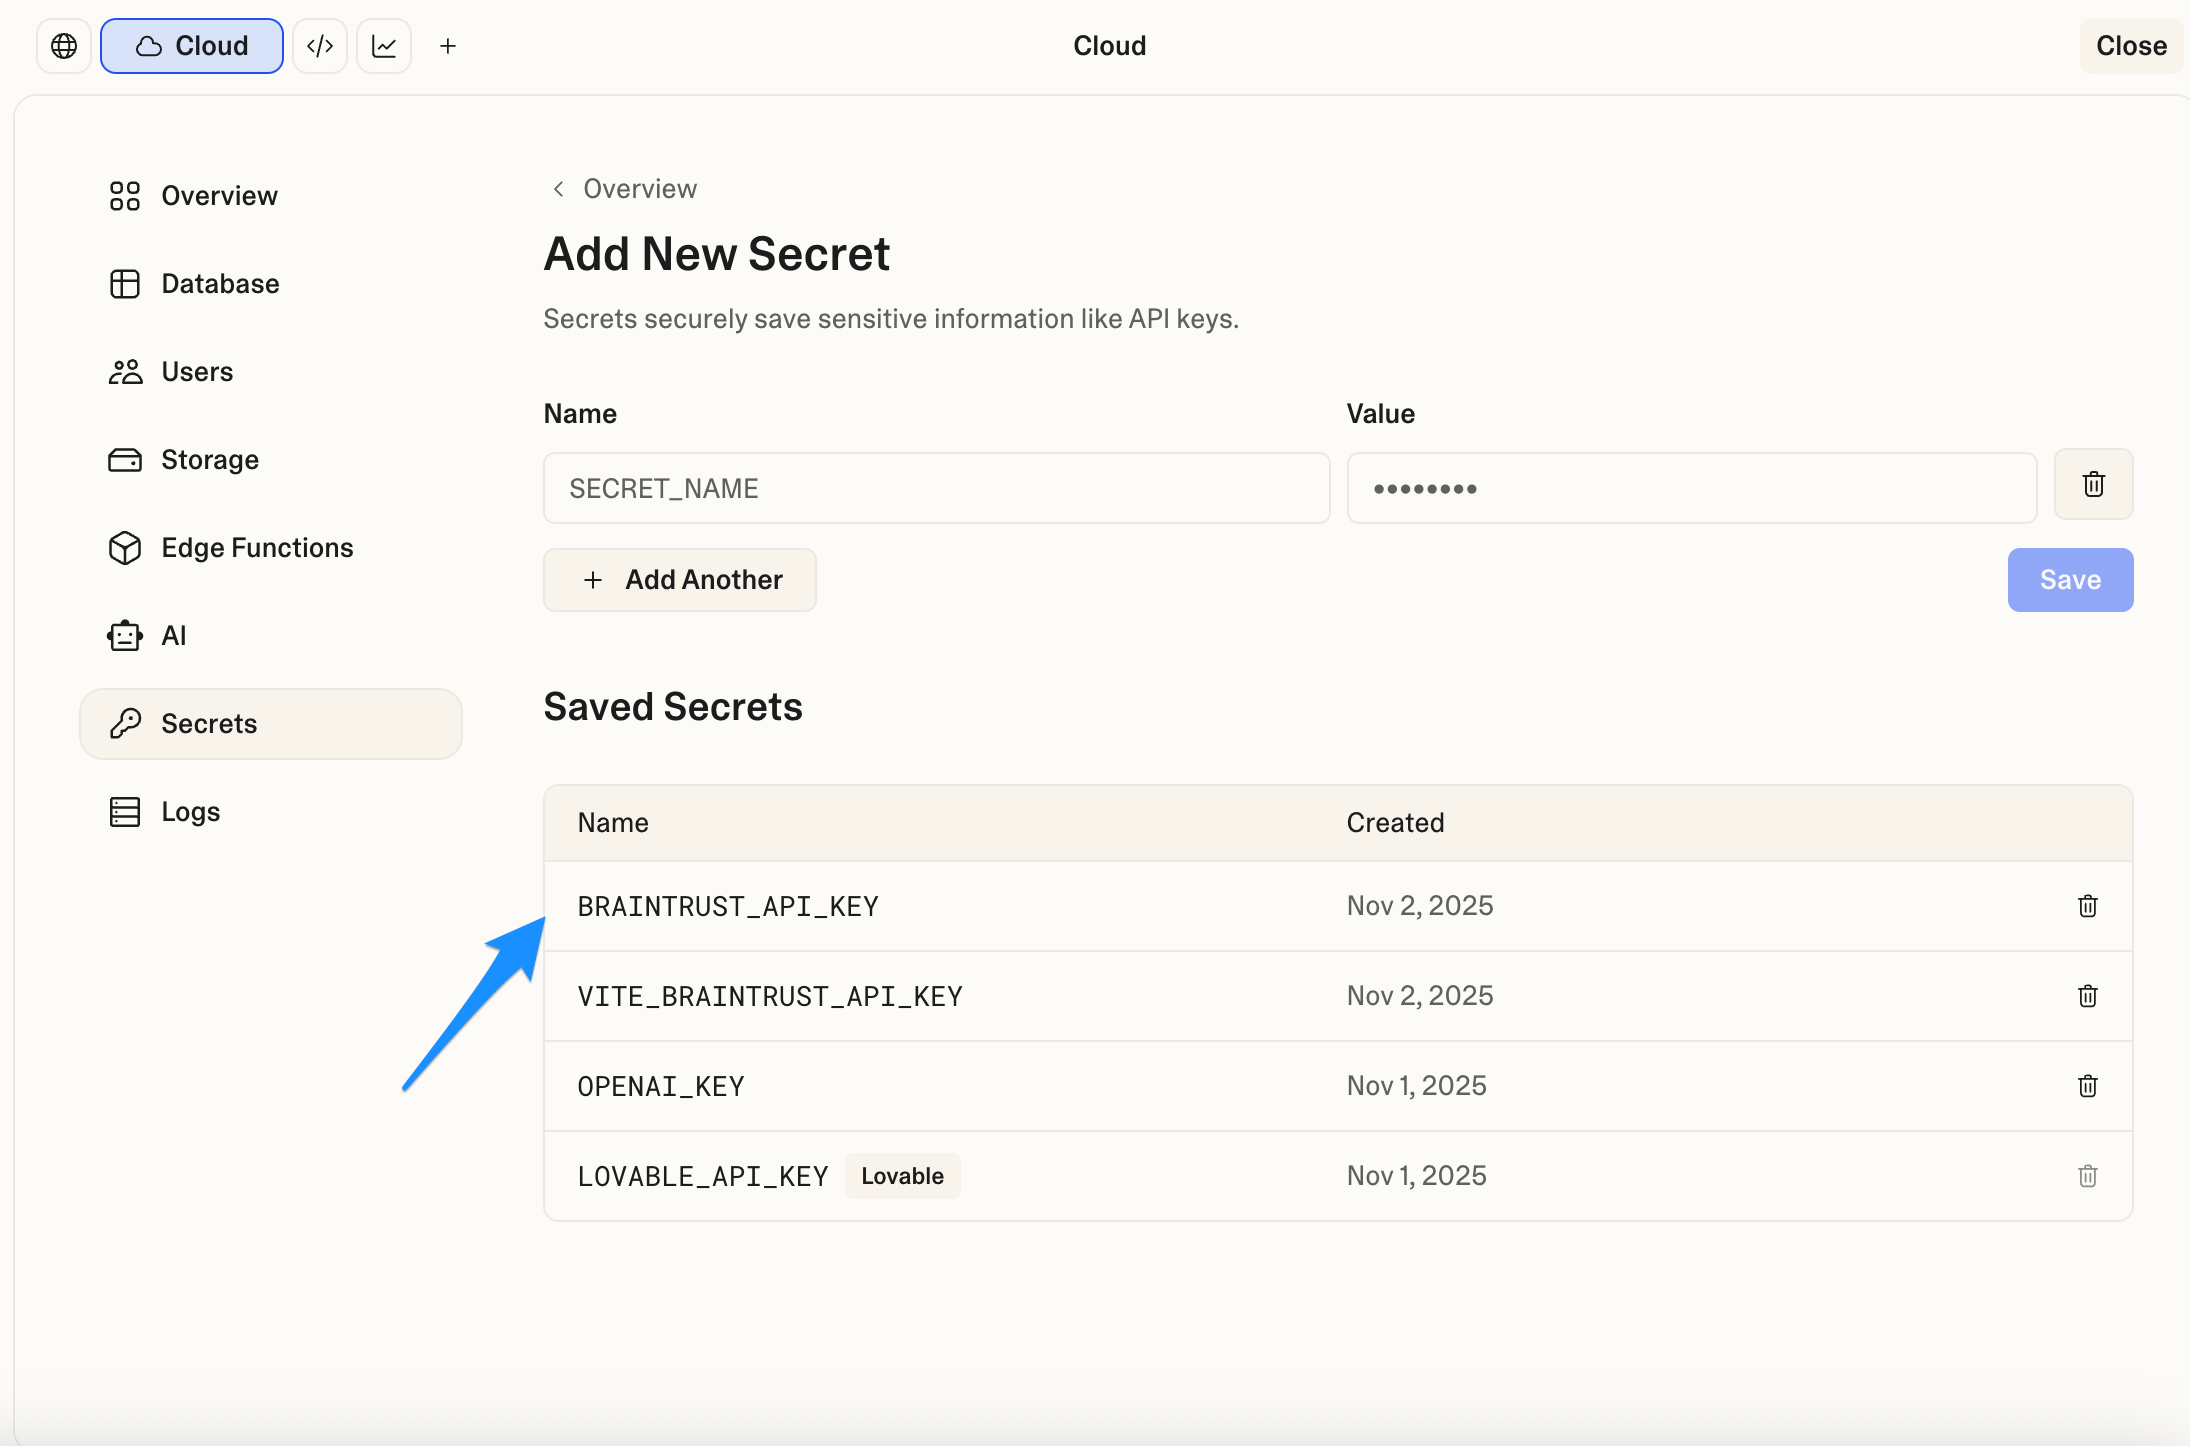
Add your API key to Lovable

From your Lovable chat interface:
  1. Select the cloud icon to access secrets management
  2. Add a new secret named BRAINTRUST_API_KEY
  3. Paste your Braintrust API key as the value
  4. Save the secret Secrets UI screenshot 2

Configure logging in your Edge Function

Ask Lovable to configure Braintrust logging by pasting this prompt into the Lovable chat:
Add Braintrust logging to [project name]'s Edge Function following this pattern:

1. Import the Braintrust SDK at the top of the Edge Function file.
2. Initialize the logger in the request handler using env var BRAINTRUST_API_KEY, with projectName set to your Braintrust project. Use asyncFlush: false to send logs immediately.
3. Create a root span named `request` and child spans for each major step (e.g., `ai_call`, `processing`).
   - Wrap main logic with `braintrust.traced(..., { name: "request" })`.
   - Create child spans with `rootSpan.startSpan("step_name")` and always `await span.end()` in `finally`.
   - Log input and output at each span for detailed tracing.
   - Provide a safe fallback path if the logger is unavailable.
4. Log inputs with clear fields (e.g., userPrompt, systemPrompt in metadata, not nested in messages).
5. Log outputs with both preview and full response.
6. If you later handle images, log full base64 data URLs: `data:image/[type];base64,[data]`.
7. Handle all errors and end spans in finally blocks.
8. Use or adapt this template:
import { serve } from "https://deno.land/[email protected]/http/server.ts";

// Import Braintrust SDK
let braintrust: any = null;
try {
  braintrust = await import("https://esm.sh/[email protected]");
} catch (e) {
  // Braintrust not available, continue without logging
}

const corsHeaders = {
  "Access-Control-Allow-Origin": "*",
  "Access-Control-Allow-Headers": "authorization, x-client-info, apikey, content-type",
};

serve(async (req) => {
  if (req.method === "OPTIONS") {
    return new Response(null, { headers: corsHeaders });
  }

  try {
    // Initialize logger
    const BRAINTRUST_API_KEY = Deno.env.get("BRAINTRUST_API_KEY");
    const logger = braintrust && BRAINTRUST_API_KEY
      ? braintrust.initLogger({
        projectName: "YOUR_PROJECT_NAME", // Replace with your project name
        apiKey: BRAINTRUST_API_KEY,
        asyncFlush: false,
      })
      : null;

    // Process request with or without Braintrust
    if (logger) {
      return await braintrust.traced(async (rootSpan: any) => {
        try {
          const body = await req.json();

          // Log input at root span
          await rootSpan?.log({ input: body });

          // ============================================
          // CHILD SPAN EXAMPLE
          // ============================================
          const childSpan = rootSpan.startSpan("example_step");
          let stepResult;
          try {
            // ← Add your logic here
            // Example: stepResult = await yourFunction(body);
            stepResult = body; // Placeholder - replace with your actual logic

            await childSpan?.log({
              input: body,
              output: stepResult
            });
          } finally {
            await childSpan?.end();
          }

          // Add more child spans as needed...

          // Log output at root span
          const finalResult = stepResult; // ← Replace with your actual result
          await rootSpan?.log({ output: finalResult });
          await rootSpan?.end();

          return new Response(JSON.stringify(finalResult), {
            headers: { ...corsHeaders, "Content-Type": "application/json" },
          });
        } catch (error: any) {
          await rootSpan?.log({ error: error?.message });
          await rootSpan?.end();
          throw error;
        }
      }, { name: "request" });
    } else {
      // Fallback without Braintrust
      const body = await req.json();
      // ← Add your logic here (same as above, just without spans)
      // Example: const result = await yourFunction(body);
      const result = body; // Placeholder - replace with your actual logic
      return new Response(JSON.stringify(result), {
        headers: { ...corsHeaders, "Content-Type": "application/json" },
      });
    }
  } catch (error: any) {
    return new Response(JSON.stringify({ error: error?.message }), {
      status: 500,
      headers: corsHeaders,
    });
  }
});

View logs

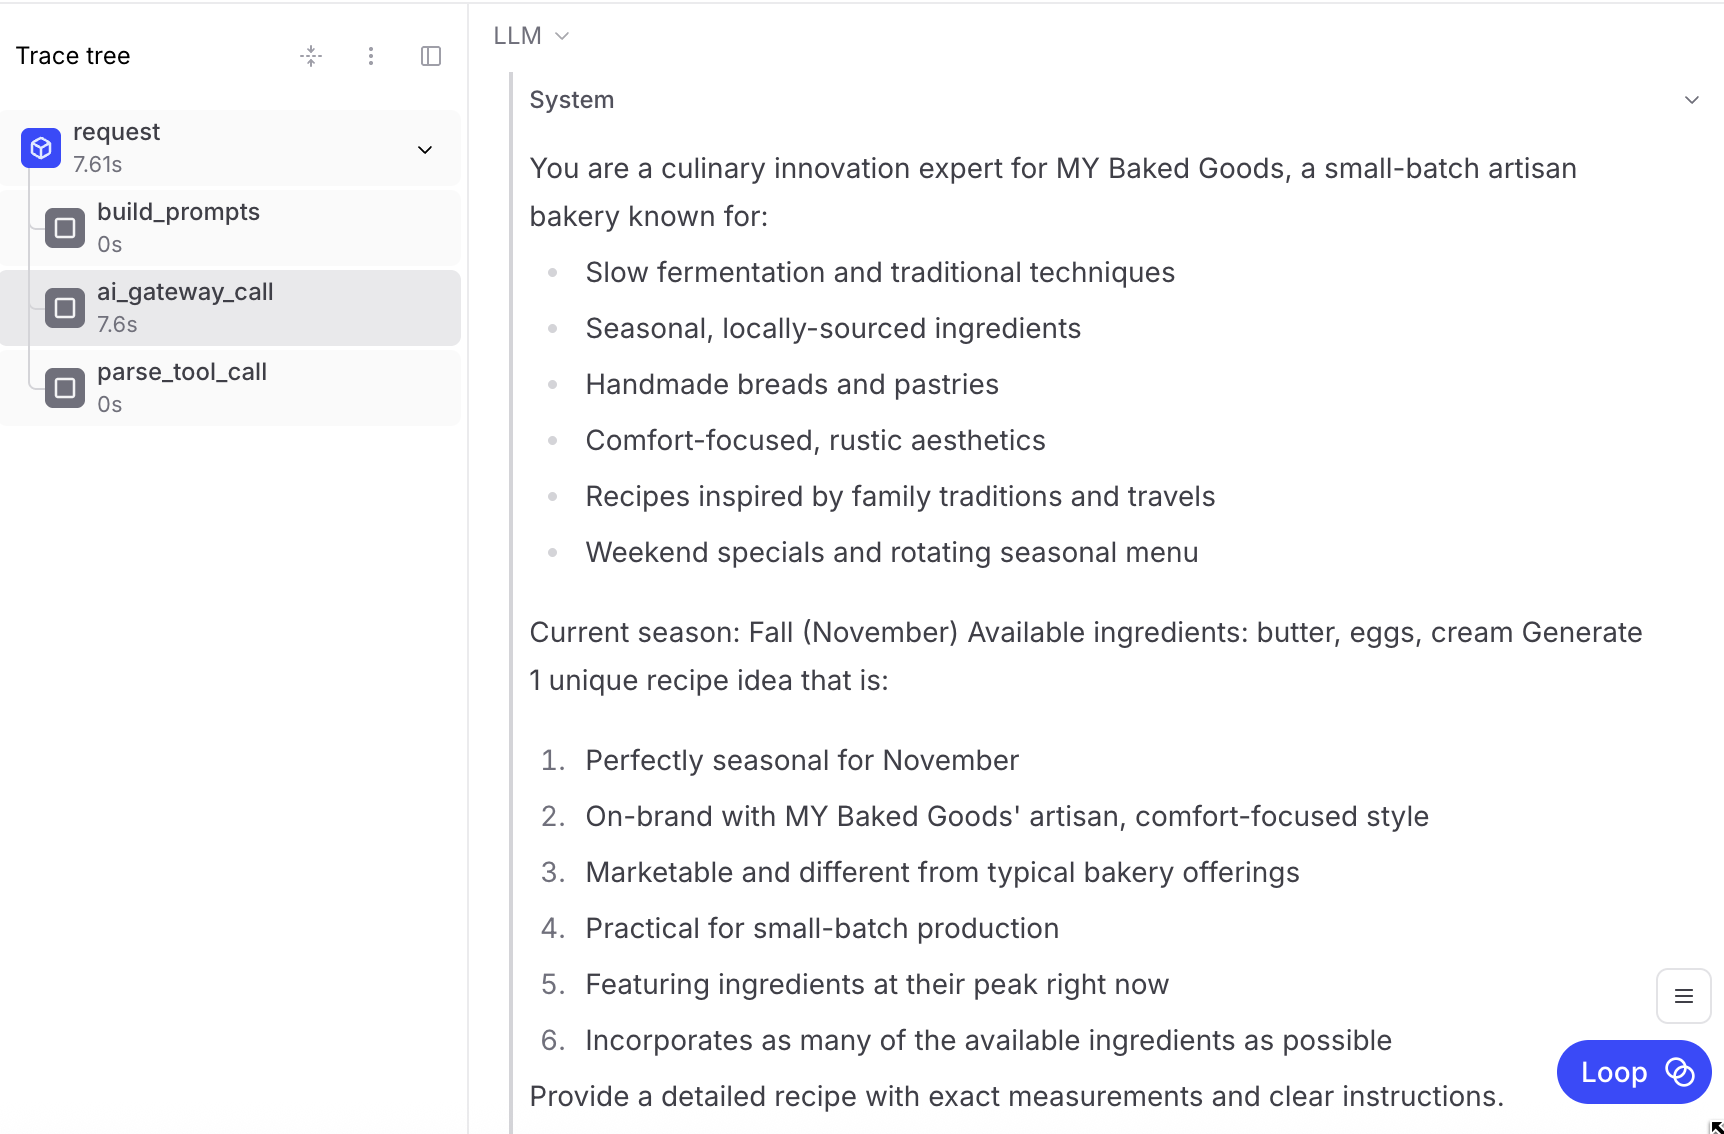
After implementing the logging, run your AI feature end-to-end. Start with text-only if you prefer, and you can add image flows later. Run flow Navigate to your Braintrust project and select the Logs tab to view traces. Confirm that the traces are streaming in real time. The 
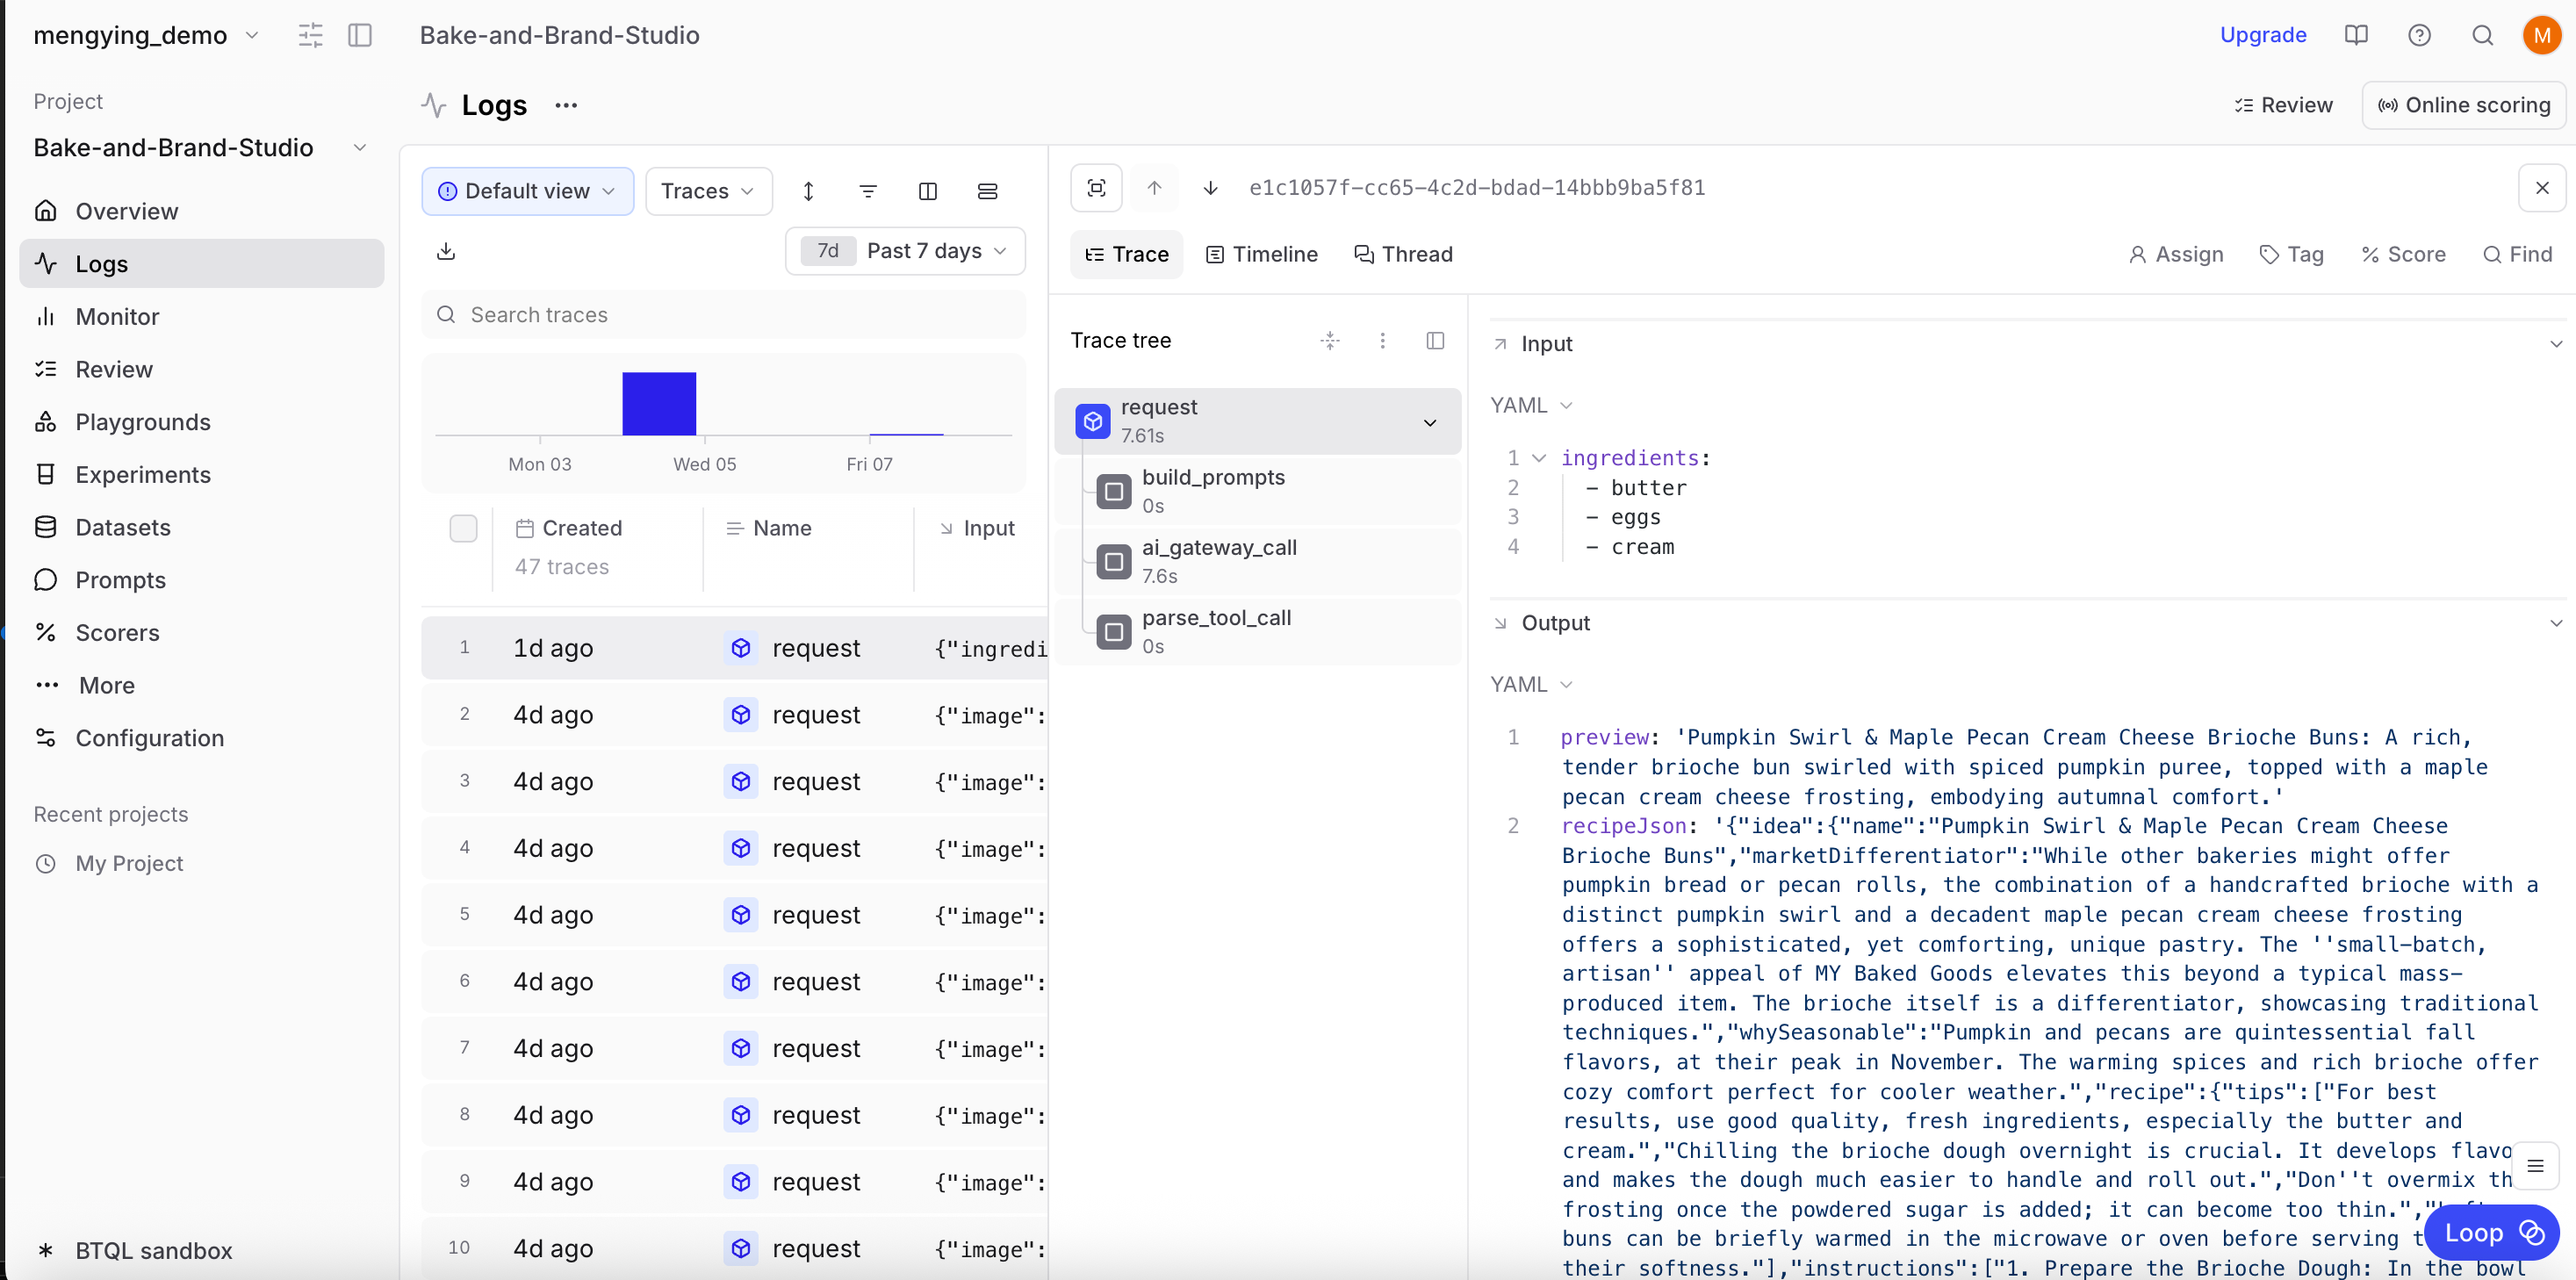
ai_gateway_call child span will show system and user prompts. Logs tab Each trace will include detailed information about:
  • Request inputs and outputs
  • AI model interactions with prompts
  • Processing steps with latency
  • Complete request/response payloads

Running eval experiments

Once logging is live, you can run evals to compare prompt or agent changes and score results:
  1. Create a playground directly from Logs
  2. Ask Braintrust’s AI assistant to add custom scorers
  3. Experiment with different models and prompts
  4. Compare results side-by-side

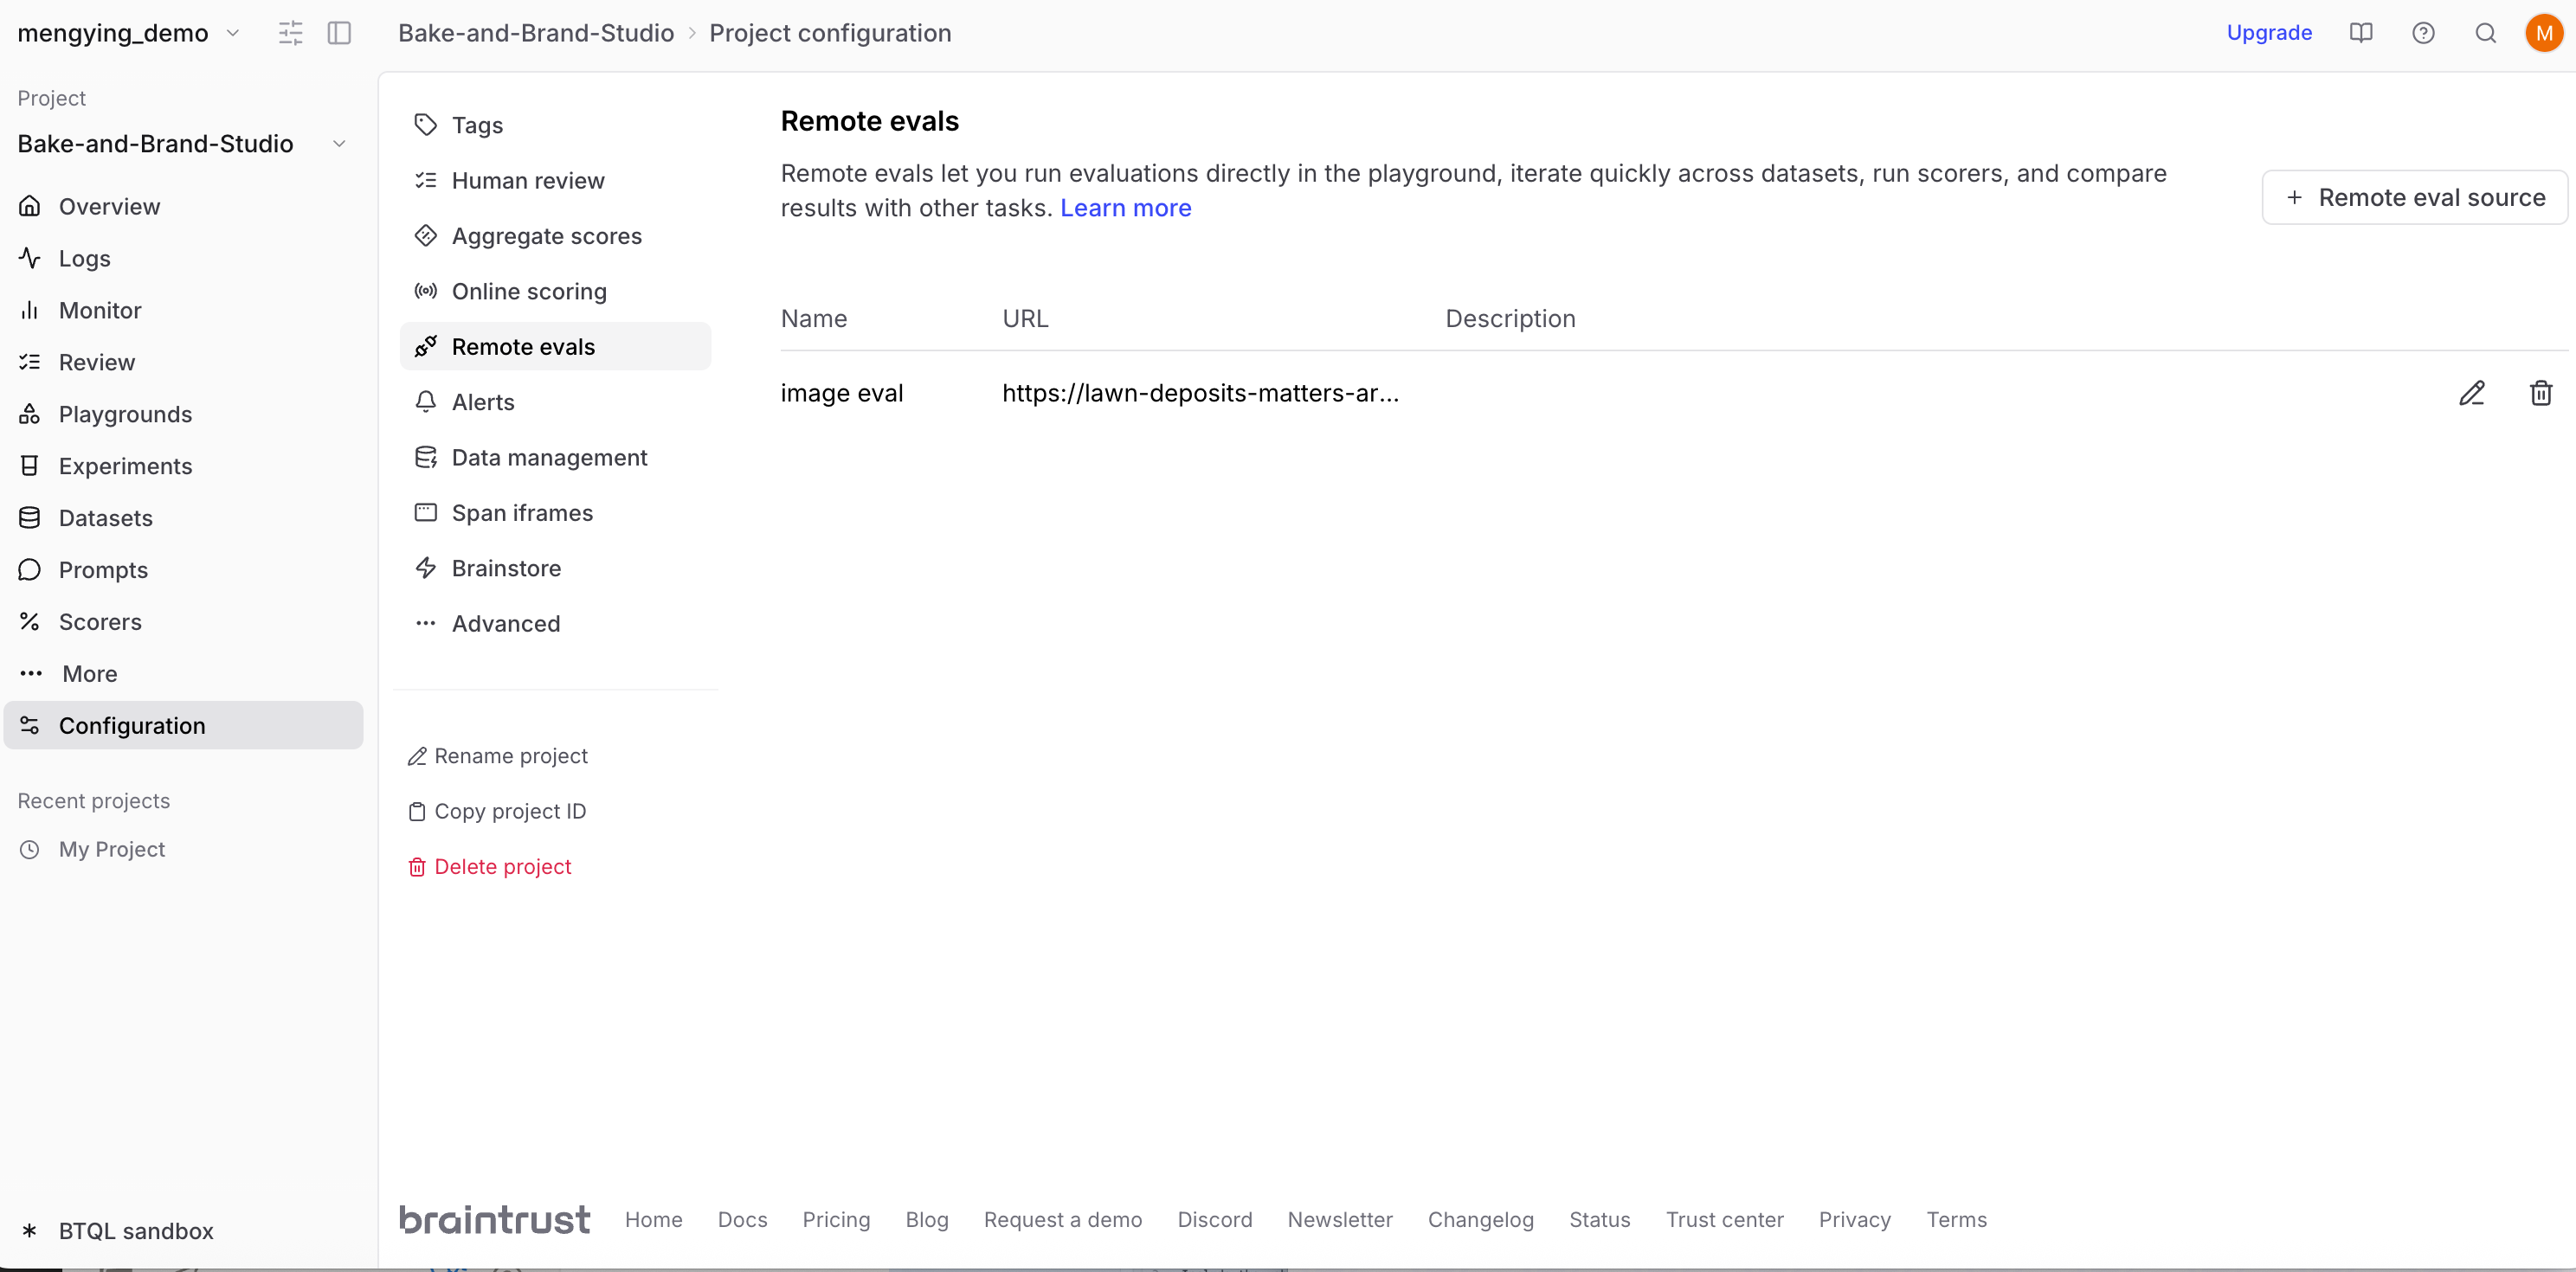
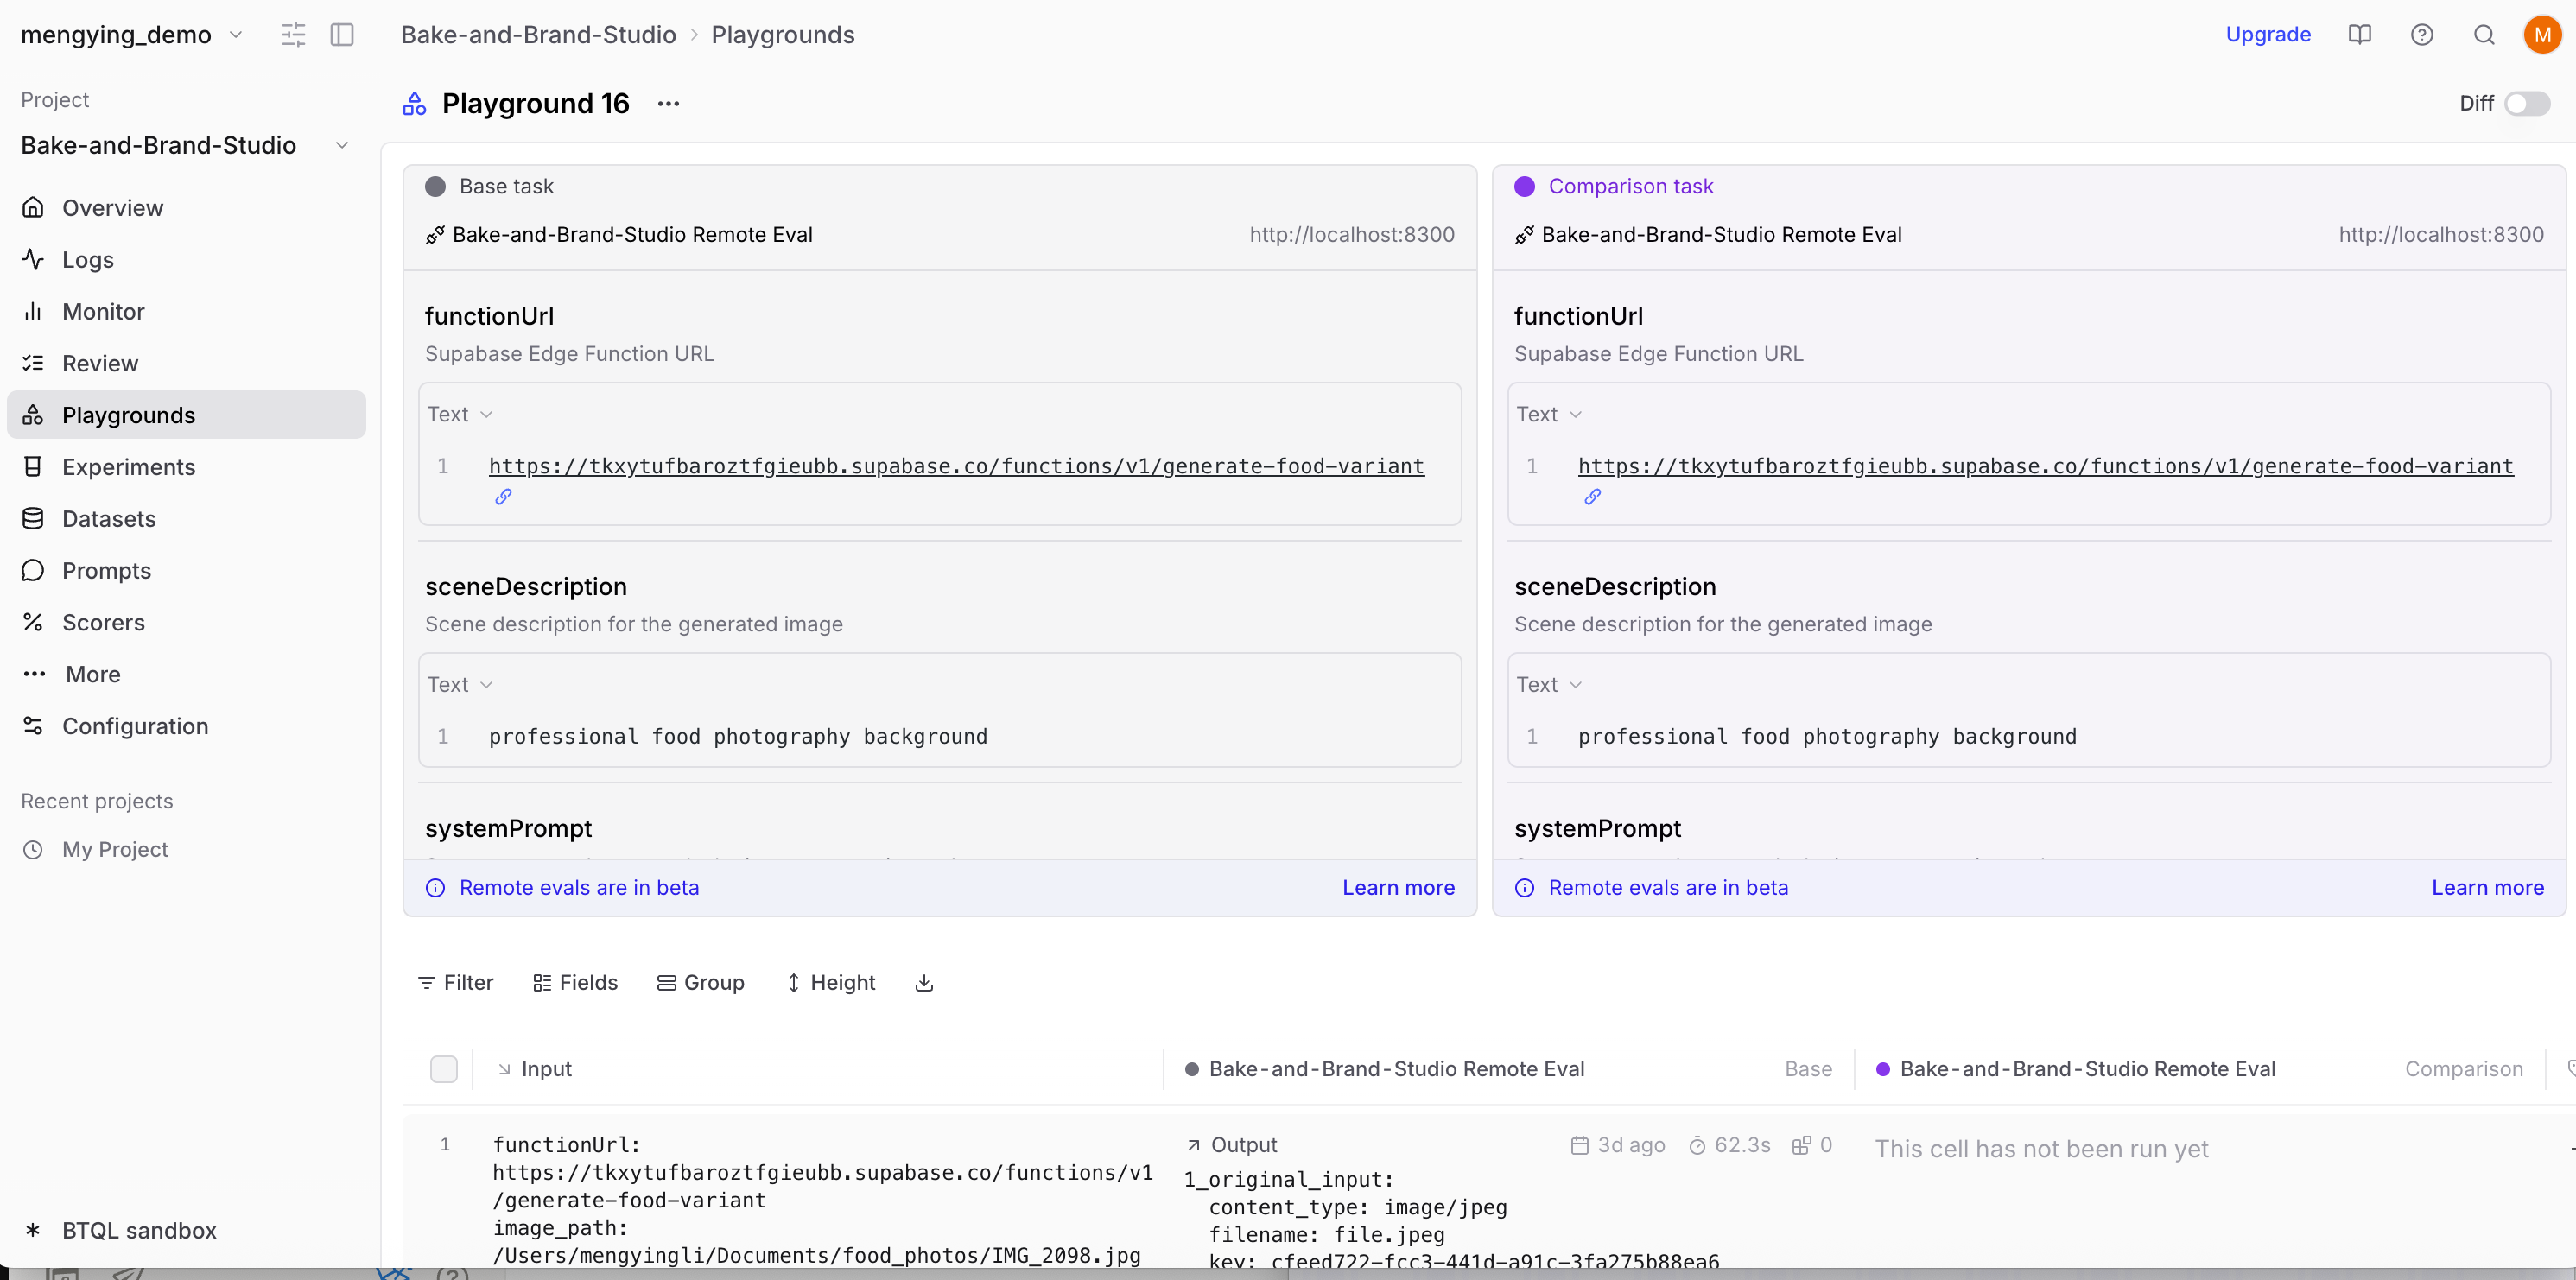
Running remote evals

You can use remote evals to tweak prompts or tool calls locally, then test your cloud function as if it were deployed.
  1. Ask Lovable for the exact Supabase Edge Function URL and substitute it below
  2. Run a local dev server
  3. Expose it via Cloudflare Tunnel
  4. Register the tunnel URL in Braintrust
import { Eval } from "braintrust";
import { z } from "zod";

export default Eval("My Function Remote Eval", {
  task: async (input, { parameters }) => {
    const functionUrl = parameters?.functionUrl || input?.functionUrl;
    const systemPrompt =
      parameters?.systemPrompt || input?.systemPrompt || "You are a helpful assistant.";
    const userPrompt = parameters?.userPrompt || input?.userPrompt;

    if (!functionUrl) throw new Error("Missing functionUrl");

    const resp = await fetch(functionUrl, {
      method: "POST",
      headers: { "Content-Type": "application/json" },
      body: JSON.stringify(input || {}),
    });

    if (!resp.ok) throw new Error(`Function error ${resp.status}: ${await resp.text()}`);

    return await resp.json();
  },

  scores: [],

  parameters: {
    functionUrl: z.string().describe("Supabase Edge Function URL").default("https://your-project.supabase.co/functions/v1/your-function"),
  },
});
To run the remote eval, start the dev server and tunnel:
npx braintrust eval my-function-eval.js --dev --dev-host 0.0.0.0 --dev-port 8400
npx cloudflared tunnel --url http://localhost:8400
Then, register the tunnel URL. You can do this from a playground or your project configuration. Add the tunnel URL (for example, https://xyz-abc-123.trycloudflare.com): Remote eval screenshot 2 And run your remote eval: Remote eval screenshot 2 Each time you’d like to run a remote eval, make sure you have the dev server running, Cloudflare Tunnel active, and Braintrust configured with the current tunnel URL.

Troubleshooting

You can ask Lovable to help you troubleshoot in the chat window.

Traces not showing up

  • Verify secret name in Supabase matches your code
  • Ensure Braintrust projectName is exact
  • Look for “[Braintrust]” console messages
  • Ensure every span calls await span.end()

Images not displaying

  • Log full base64 data URLs
  • Keep payloads under ~10 MB per trace
  • Use format: data:image/png;base64,...
  • Don’t log booleans — include the actual data

Errors in logs

  • Verify SDK import succeeded
  • Check that API key is valid
  • Ensure asyncFlush: false is set
  • Confirm outbound network access is allowed from Supabase Edge

Next steps

Now that you have a Lovable app with full observability and evaluation capabilities, you can:
  • Create custom scorers to evaluate AI quality against specific criteria
  • Build evaluation datasets from production logs to continuously improve your app
  • Use the playground to experiment with prompts before deploying changes
  • Add more AI features to your Lovable app with confidence in their quality